Windows Installation
- Akshay Sharma (Unlicensed)
- Tharun Kumar K (Unlicensed)
- Rajkumar (Unlicensed)
Know more about how to install Insights on Windows
Recommended installation for windows is to keep Neo4j and Elastic Search (Optional software) on Machine 1 and remaining components on Machine 2.
Download the deployment zip from link provided, and follow the instructions as per the documentation in the zip file. Click here to download.
Prerequisite
Install Below Packages-
- For now Insights is tested only on Windows 64 bit OS family and RHEL7
- Powershell version 4 for windows
- Browser – Chrome only for now
Jdk 11 with JAVA_HOME set in environment variable, For Open JDK https://jdk.java.net/archive/, For Oracle (http://www.oracle.com/technetwork/java/javase/downloads/)
- GitBash (Server2\Configs\HandyFiles)
Set Path and Environment Variables (Change default locations as applicable)
Run below in a New Command Prompt Window:
setx -m JAVA_HOME "C:\Program Files\jdk-11" (Change default location as applicable)
Install Server 1 (First Time Set up)
- Click here to get Neo4j installation steps.
Execute below bat files in same order (Run as administrator)
- Execute the bat file " SetEnvVariables.bat"
- Execute the bat file "Neo4j-SetUp.bat" (Run as Admin)
- Change neo4j default password
- Login to neo4j - http://hostname:7474 Username: "neo4j", Password: "neo4j"
- Change the default password as per your choice
Optional software Elasticsearch steps:
- Execute the bat file "ES-SetUp.bat"
- Execute the bat file "ES-StartUp.bat"
Execute below CURL command from GitBash to fix split-analyzed string fields in ElasticSearch DB:
curl -XPUT 'localhost:9200/_template/neo4j-*' -d '{"order" : 0, "template": "neo4j-*","settings": {"index.number_of_shards": "5"},"mappings": {"_default_": {"dynamic_templates": [{
"string_fields" : {
"mapping" : {
"index" : "analyzed",
"omit_norms" : true,
"type" : "string",
"fields" : {
"raw" : {
"ignore_above" : 256,
"index" : "not_analyzed",
"type" : "string"
}}},
"match_mapping_type" : "string",
"match" : "*"
}
}]}},"aliases": {}}}'
For Subsequent Server 1 - Start and Stop (if required)
Click here to get the bat files.
Start Server 1
Execute below bat files in same order (Run as administrator)
- ES_StartUp.bat
- Neo4j_StartUp.bat
Stop Server 1
Execute below bat files in same order (Run as administrator)
- Stop-Neo4j-ES.bat
Uninstall Server 1
Execute below bat files in same order (Run as administrator)
- Stop-Neo4j-ES.bat
- DeleteServices.bat
- Delete Server1 Directory
- Delete Environment Variables (if needed)
Note:
Change default password of neo4j as required (localhost:7474)
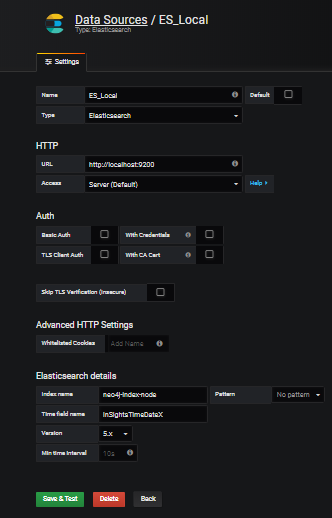
Add Elastic Search data source in Grafana
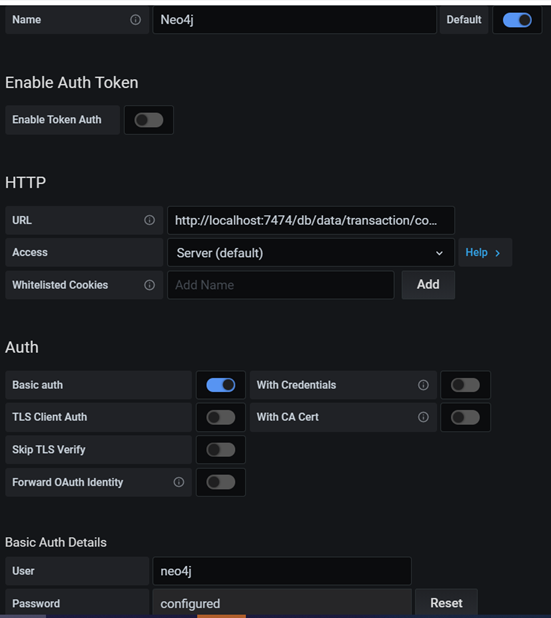
Add Neo4j Data source in Grafana
Troubleshooting
- Neo4J:
- Got to: “Server1\neo4j-Insights\bin”
- neo4j install-service
- ElasticSearch:
- Got to : “Server1\elasticsearch-5.6.4\bin”
- service.bat install
- Neo4J:
Prerequisite
Install Below Packages-
- For now InSights is tested only on Windows 64 bit OS family and RHEL7
- JDK 11 with JAVA_HOME set in environment variables(http://www.oracle.com/technetwork/java/javase/downloads/)
- Browser – Chrome only for now
- Python 3.10.2
- RabbitMQ 3.9.13
- Erlang OTP 23.3.4.11
- The prerequisite ports must be made free before execution.
Install RabbitMQ and Erlang
- Refer RabbitMQ and Erlang Installation to install RabbitMq and Eralng and to set the environment variable.
Install Python
- Refer Python Installation to install Python 3.10.2 and to set the environment variable.
Install Grafana
Click here to get grafana installation steps.
Install PostgreSQL
Click here to get postgreSQL installation steps.
Install PlatformService and UI
Click here to get PlatformService and UI installation steps.
Create iSight user in RabbitMQ
Login to RabbitMQ - http://hostname:15672/#/users Username: "guest", Password: "guest"
Goto Admin, Add User "iSight", Password "iSight", Tag: "administrator"
Edit "iSight" user, "Set Permission" to Virtual Host "/"
Verify RabbitMQ
- Verify ERLANG_HOME env variable is set.
- Launch rabbit mq in browser http://hostname:15672/#/
- Login with iSight:iSight.
Verify Python
- Verify PYTHONHOME and PYTHONPATH environment variables are set.
- In cmd prompt type “python --version” result should be “Python 3.10.2”
Install Server 2
Download the latest UI, Service, PlatformEngine, and AgentDaemon Artifacts from the following URL
Browse URL: https://github.com/CognizantOneDevOps/Insights/releases/
Extract, rename and place the artifacts at the following folder locations
- Platform Engine JAR - "Server2\Insights_Engine\PlatformEngine.jar"
- Platform Daemon Agents - "%INSIGHTS_AGENT_HOME%"-(Refer: Daemon agent configuration and execution section of Agent Installation)
Execute below bat files in same order (Run as administrator)
- Execute the bat file " SetEnvVariables.bat"
- Execute the bat file " Postgresql-12-DB-SetUp.bat"
- Execute the bat file " Postgresql-12-DB-StartUp.bat" (Do NOT close the "PSQLPROMPT" command window) – Later we can convert this to service.
Execute the bat file "EngineServiceSetup.bat"
- Execute the bat file "EngineServiceStart.bat"
- Follow Steps mentioned in First Time Setup below
Change endpoints as required in "Server2\INSIGHTS_HOME\.InSights\server-config.json" . For more detail Server Configuration (server-config.json) , make sure user fill all mandatory field in server-config.jsonFirst Time Setup
- If you want to setup LDAP, use grafana configuration files (available in grafana conf folder) for more detail- Please refer https://grafana.com/docs/auth/ldap/
- Create new user in Grafana
- Login to Grafana - http://hostname:3000/ Username: "admin", Password: "admin"
- Create New Global User - http://hostname:3000/admin/users/create
- Username: "PowerUser", Password: "C0gnizant@1"
- After creating the user, Edit "PowerUser" and set Permissions "Grafana Admin"
- Also, Change Role from "Viewer" to "Admin" for "Main Org" Organization
- Ensure "ElasticSearch_DS" and "Neo4j_DS" Data Sources are available in Grafana
- To create PostgreSQL as windows service, use following command pg_ctl.exe register -N "postgresql" -D "C:\Insights\InSights_Windows\Server2\postgresql-9.5.4-1\pgsql\data" -w
For Subsequent Server 1 - Start and Stop (if required)
Click here to get the bat files.
Start Server 2
Execute below bat files in same order (Run as administrator)
- Postgresql-12-DB-StartUp.bat
- EngineServiceStart.bat
Stop Server 2
Execute below bat files in same order (Run as administrator)
- Grafana-Tomcat-Postgres-ShutDown.bat
Uninstall Server 2
Execute below bat files in same order (Run as administrator)
- Grafana-Tomcat-Postgres-ShutDown.bat
- DeleteServices.bat
- EngineServiceStop.bat
- Delete Server 2 Directory
- Delete Environment Variables (if needed)
Note:
- Please ensure that the Insights config.json is present under INSIGHTS_HOME
- And change all endpoints to 127.0.0.1 (localhost) or as required
Troubleshooting
- If any DLL missing error during Postgresql-12-DB-SetUp, Copy "msvcp120.dll" and "msvcr120.dll" from "Server2\Configs\HandyFiles" to "Server2\postgresql-12.5-1-windows\pgsql\bin"
- If any of the services do NOT install automatically, please use manual commands given below:
- Grafana:
- Go to: “Server2\nssm-2.24\win64”
- nssm install Grafana grafana-7.5.10\bin\grafana-server.exe
- Tomcat (It needs Catalina home set up):
- Navigate to "Server2\apache-tomcat\bin\"
- service install
- If "ElasticSearch_DS" and "Neo4j_DS" Data Sources are not configured automatically in Grafana, kindly configure them manually.
- RabbitMQ & Erlang/OTP:
- Click here to know the troubleshooting steps
EngineJar:
Open Command Prompt, Navigate to "Server2\Insights_Engine\EngineJar\"
java –jar PlatformEngine.jar
Agent Configuration and Execution:
- Follow new Agent Installation Instructions given below.
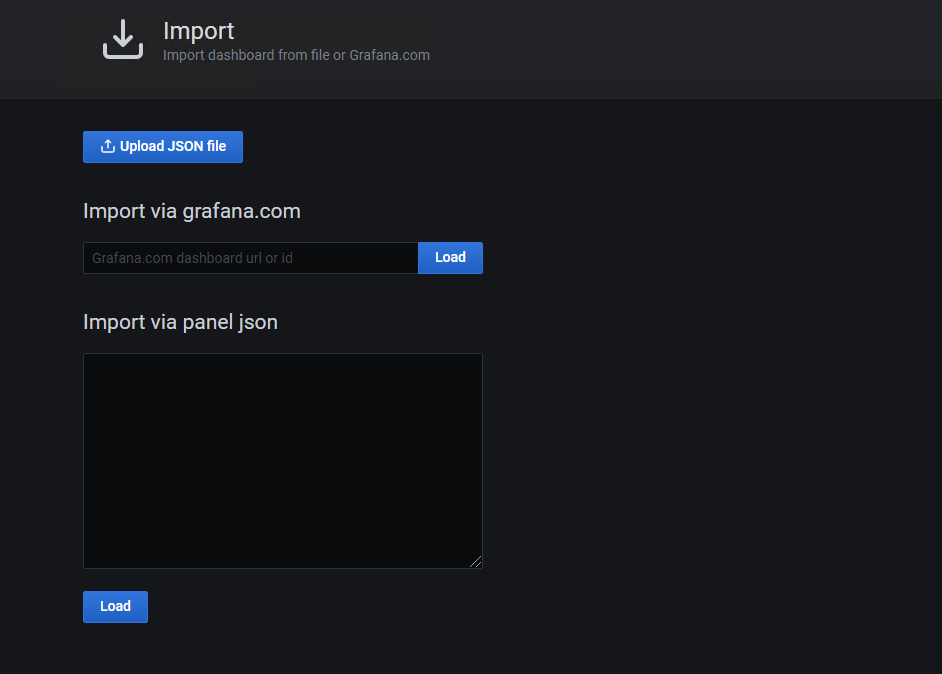
Import pre-configured dashboards in Grafana
- Get pre-configured dashboards json from DevOpsPlatformSupport@cognizant.com
- Import json files one by and add relevant data sources.
Below artifacts are developed and tested as part of Insights.
Please download the artifacts using URL: https://github.com/CognizantOneDevOps/Insights/releases/
- Platform Service JAR
- Platform Engine JAR
- Platform UI
- Platform Daemon Agents
Related content
©2021 Cognizant, all rights reserved. US Patent 10,410,152